
Google is killing it with its AI models, with the recent announcement of Gemini 3, which leads in almost all major benchmarks, setting a new benchmark.
Not just the text models, Google is now also leading in Image models with its Nano Banana Pro, and its advanced Veo 3, its latest text-to-video generator models, which can produce realistic videos with both video and audio.
Thanks to its high-quality output, Google Veo 3-generated videos are already being used in traditional production and saving hours of time. Many video editing models have already integrated Google Veo 3 into their workflow, making it easy for video editors to easily access and integrate with their workflow.
One such popular video editor is Filmora, which now comes with a Google Veo 3 AI video generator available natively on its platform. You can generate videos, add them to your clipboard and easily export them. In this guide, let’s learn how this can be useful and what makes native integration so effective for users to create videos.
Step-by-Step Guide: Using Filmora with Veo 3 AI Video Generator to Make Pro-Level Videos
Google AI Veo 3 Is the Best in the World
Google Veo 3 is the third-generation text-to-video model. Google Veo 1 was introduced in 2024. However, the launch was a bit sloppy, where the majority of the generative videos, the Veo 1 model has issues, random objects appearing and reappearing, and a lack of physical and sometimes even generated unrelated videos to the prompt.
However, Google made a significant jump from version 1 to version 3 (3.1), especially in the quality. It now also supports native audio generation, which perfectly syncs with videos, better visual quality. It can even generate high-quality 4K videos, producing overall better results with better consistency, and even supports multiple aspect ratios, which I am going to talk about in a minute, and a much more significant overall jump from previous generations.
Easy to Access and Integrate Into Your Video Editing Workflow
Having a high-quality model alone doesn’t make it the best; what makes it best is how easy it is to use to produce high-quality content. While Google’s Veo 3 can generate high-quality models, only a few AI video editing apps currently support it.
Moreover, downloading the videos also takes significant time, and even makes it a hassle importing them to the editor and integrating with your timeline and enhancing it. So now with Filmora Veo 3 AI video generator, you can easily generate videos and add them to your workflow without needing to switch between apps. You can also fine-tune your output with Filmora editing tools and color grading to match it with other clips.
Vertical Video Support
Short-form content has seen rapid growth after COVID-19. Because of this, many creators and brands have started creating short-form video content. Now they have become a part of the video generator alongside their long-form content.
If you also work on creating short-form, you don’t need to crop AI videos to fit into the short-form aspect ratio because Google Veo 3 now natively can generate vertical videos at a max resolution of 1080p, so you can also use high-quality video editing models for short videos, too.
Not just that, Google Veo 3 also makes it easy to create faceless videos with better animation. It is also great for beginners who struggle to produce production elements and scenes without needing high-end equipment, and is ideal for faceless YouTube creators to enhance on-screen visuals.
How to Use Filmora With Veo 3 AI Video Generator
Step 1: Open the Filmora video editor. If you don’t have one, you can download it from their website for free. However, you need an advanced subscription to access Filmora AI features.

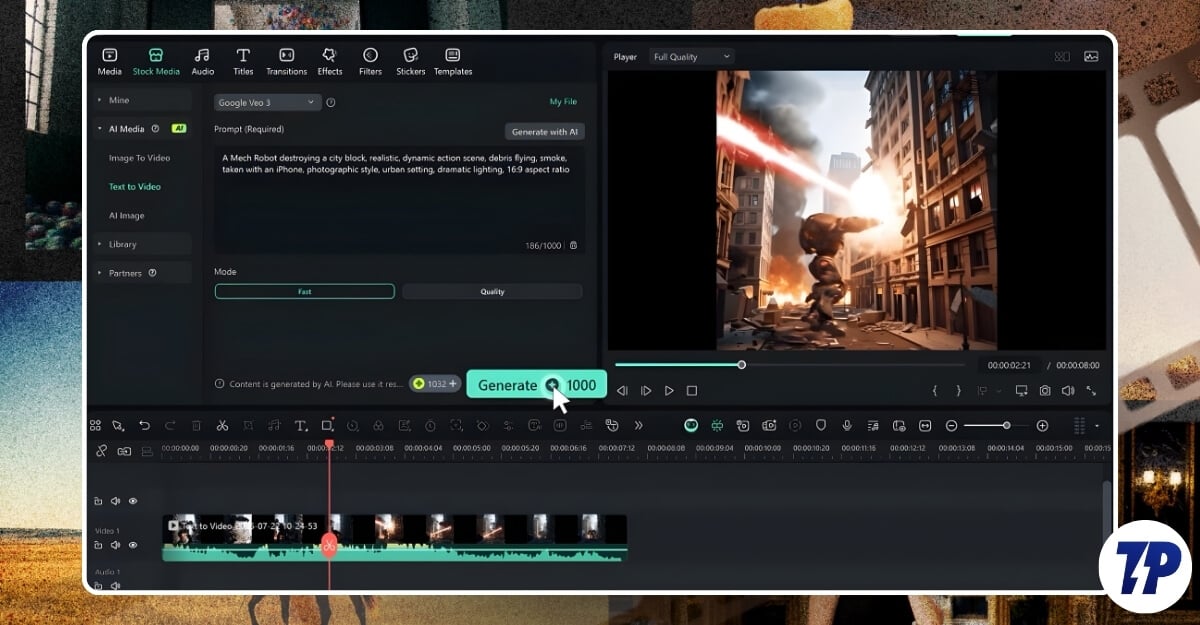
Step 2: Open and from the main panel, choose the Text to Video option.

Step 3: Next, choose the model; it comes with two options. The normal mode and with Google Veo 3 support. The Normal Mode makes standard videos based on your text, and the Google Veo 3 Mode generates high-quality videos using Google Veo 3.

Step 4: Now, in the text box, enter your prompt, and ensure your prompt is detailed for better results. Here is the guide on how to make your video generator prompt better for high-quality outputs.

Step 5: Next, you can preview the video in the side panel, and you can also regenerate and make adjustments. The best part is that since it integrates natively with Filmora video editor, you can directly drag it to the timeline, make judgments, and use other Filmora tools to enhance it and edit the video to match your style.

Step 6: Once you have generated the video, you can easily export it, and you can add other clips from the timeline and integrate them with the existing video flow.
Not just a video, you can also convert existing clips into animated videos, including photos into realistic animated videos.
Since it’s an AI model, it can hallucinate, so to get better outputs, I have already shared a detailed guide on how to prompt better to get high-quality Veo 3 outputs, and here are some tips to get even better results.
First, use a detailed prompt. You can use any other AI text model, such as Gemini or ChatGPT, to get detailed prompts. Google Gemini 3 also natively supports the audio generation feature. You can also explicitly mention, like which character should have the voice, and you can also use that text for a better voice-over.
If you want to integrate AI-generated clips and are struggling with visual consistency, you can use Filmora’s color grading feature to make two scenes visually similar.
Should You Use Google Veo 3 Inside Filmora?
While AI videos can be useful, what makes them the best is creating a high-quality output instead of just creating an AI slop that can hurt your branding and your expectations if you are a brand or even as an individual creator. So, Filmora’s video editing tool can be a great option to generate, edit, and create high-quality videos. If you’re interested, you can check out Fimora pricing and the AI features it offers.